
Build
Build your own cryptoclock. You only need basic electronic skills and two components:
- 1x ESP8266 developer board (NodeMCU)
- 1x MAX7219 based LED matrix display (4-in-1, 8×32)
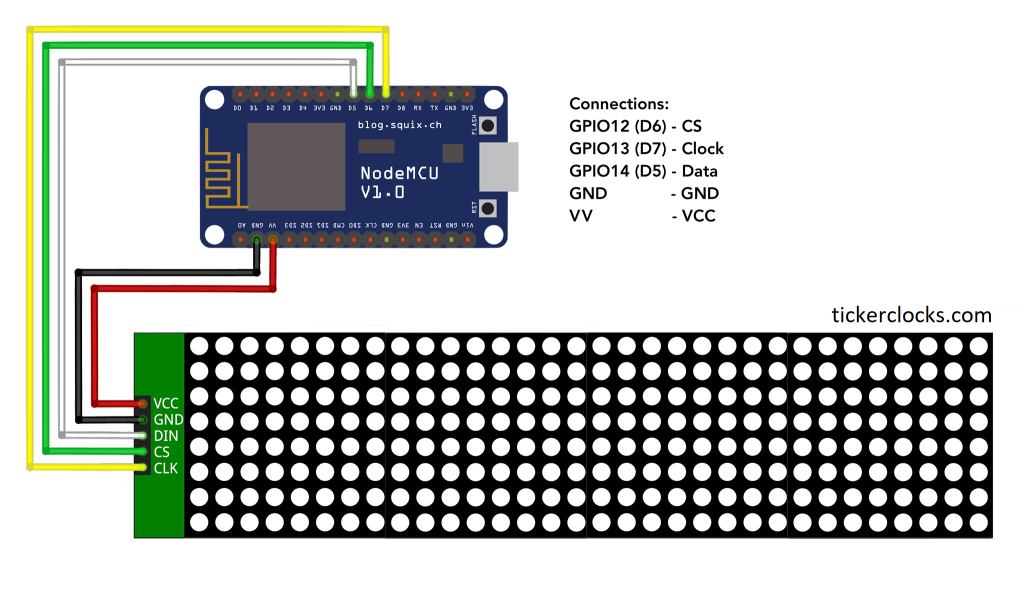
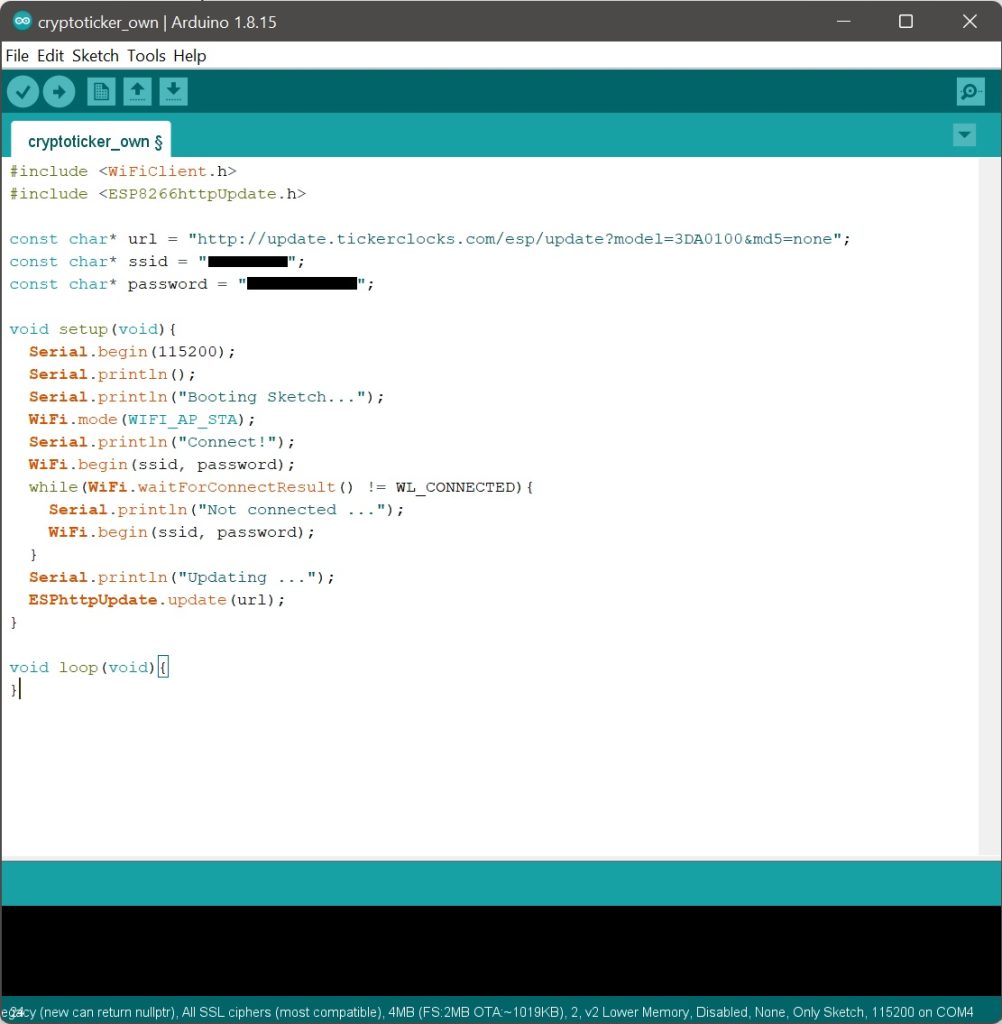
After you’ve assembled your hardware, you can upload our basic firmware loader, which will auto-install the latest firmware version. The device will restart a couple of times during the installation, and it should be up and running within a couple of minutes. Make sure you adjust both YOUR_WIFI_NETWORK_NAME and YOUR_WIFI_PASSWORD accordingly.
#include <WiFiClient.h>
#include <ESP8266httpUpdate.h>

const char* url = "http://update.tickerclocks.com/esp/update?model=3DA0100&md5=none";
const char* ssid = "YOUR_WIFI_NETWORK_NAME";
const char* password = "YOUR_WIFI_PASSWORD";

void setup(void){
  Serial.begin(115200);
  Serial.println();
  Serial.println("Booting Sketch...");
  WiFi.mode(WIFI_AP_STA);
  Serial.println("Connect!");
  WiFi.begin(ssid, password);
  while(WiFi.waitForConnectResult() != WL_CONNECTED){
    Serial.println("Not connected ...");
    WiFi.begin(ssid, password);
  }
  Serial.println("Updating ...");
  ESPhttpUpdate.update(url);
}

void loop(void){
}
To flash your ESP8266, you can use Arduino IDE. While we can’t provide help for the flashing process if the device was assembled by you, it’s a fairly simple and straightforward procedure.
Once your device is ready, please register an account here, log-in, and pair your device here, and you should be good to go. If you need more information on pairing, please click here.
How to flash ESP8266 with Arduino IDE
1. Download and install the latest version of Arduino IDE here.
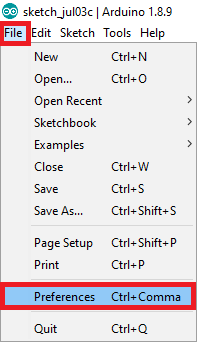
2. Once the installation is complete, run Arduino IDE. Then, go to File> Preferences.
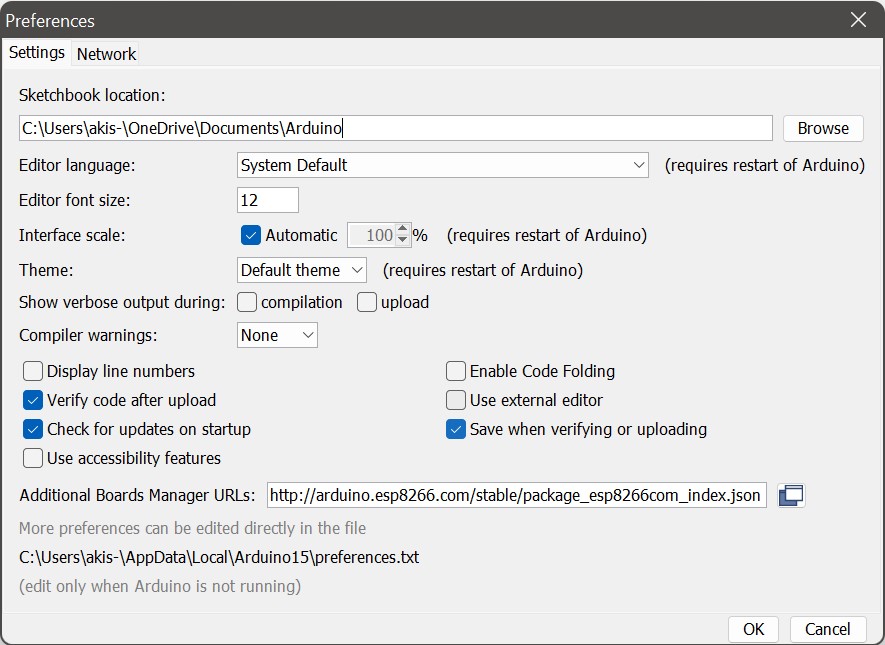
3. Enter:
http://arduino.esp8266.com/stable/package_esp8266com_index.jsoninto the “Additional Boards Manager URLs” field as shown in the figure below. Then, click the “OK” button:
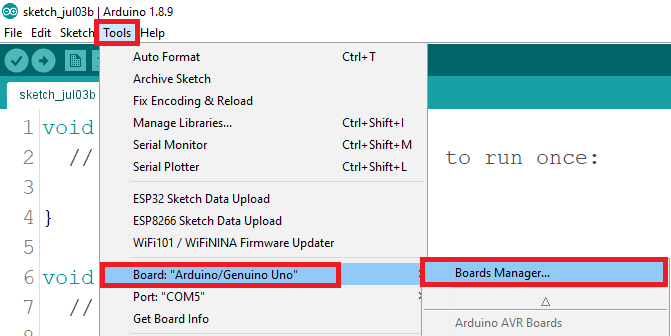
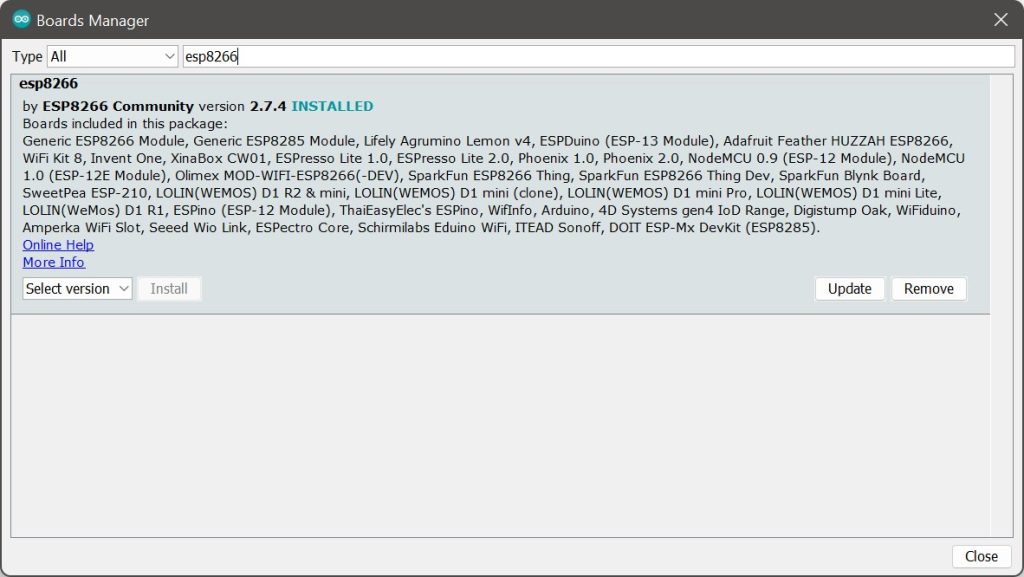
4. Open the Boards Manager. Go to Tools > Board > Boards Manager.
5. Search for ESP8266 and press install button for the “ESP8266 by ESP8266 Community“. Make sure you choose to install the 2.7.4 version (and not the latest one).
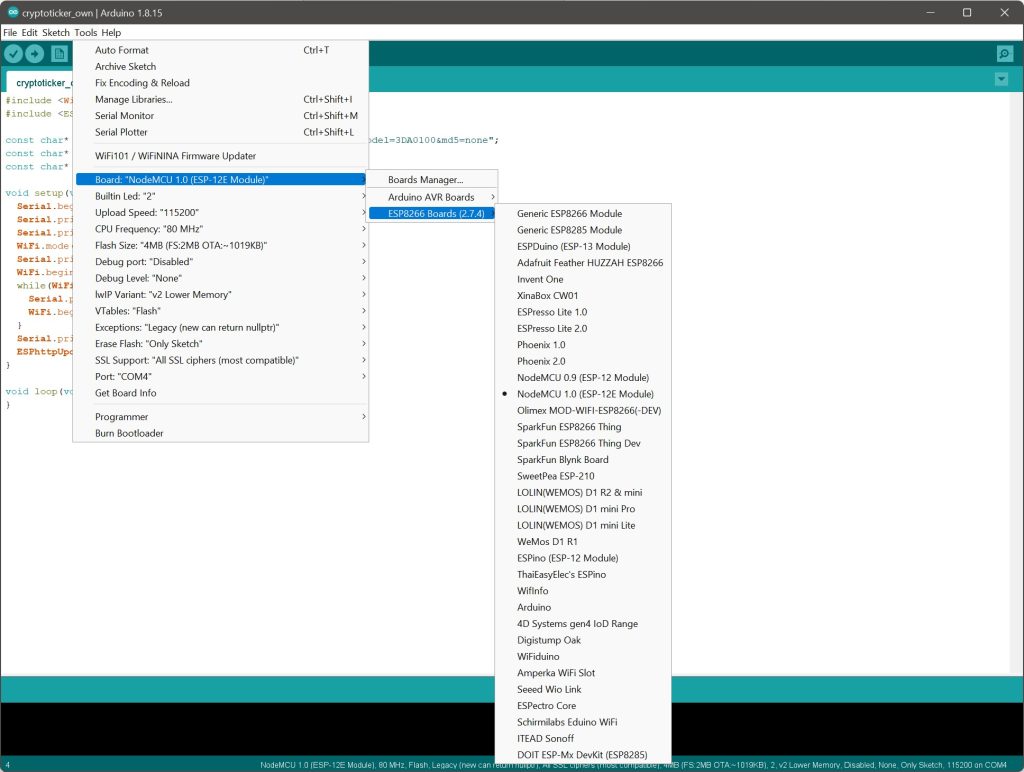
6. Go back to Tools > Board > ESP8266 Boards, and choose NodeMCU v.1.0 board.
7. That’s it, you are now ready to flash your code to the board.
Paste the code mentioned in the beginning of the post in the main window (remember to use your own WiFi network credentials):
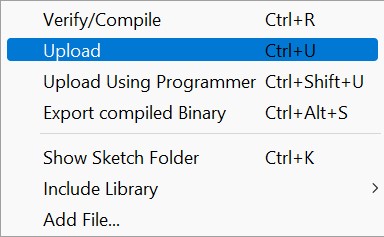
8. Then, go to Sketch > Upload, wait a few minutes, and your device should be ready.
Once your device is powered on and connected to your own network, please register an account here, log-in, and pair your device here, and you should be good to go. If you need more information on pairing, please click here.
If you are facing issues, make sure the ESP8266 is detected by your computer upon connection, and that the correct port is chosen for flashing (COM4 in the picture shown above, check your Device Manager to verify the port number).